OMG OMG I actually played that thing!

Looking at the analytics, I have noted that my reminiscence to/analysis of the Keytek CTS-2000 synth has been found by a number of people that surprises me, given that it is an article about a truly horrible, obscure late-80s hybrid synth in a rather niche blog. Given that, I would like to share some proof that I actually played that thing, and on stage, too. And though it is hard to date the old photographs, I would estimate that I held onto it for quite some time.

So I guess at least the CTS-2000’s keyboard was really decent.

5-piece band: female bass player, percussion player, guitarist, keyboardist with guitar.

The band, by the way, was named “Voice of the Alien”. You won’t find anything Googling it.

I added another photo to the original article.

Yay! I’ve bought a DIY Minimoog. (And Jenny is going to love it!)

Isn’t it GORGEOUS? Classic Minimoog – less of a control panel, more of an erogenous zone for synth nerds. Tell me you don’t want to feel up these knobs! The pure beauty of a one-of-a-kind electronic instrument. The design and the sounds are still in highest demand more than 50 years after its design – and I was pretty sure I’d never, never even be tempted to buy one.

I never even wanted a Minimoog!

Let’s be honest: Moogs are ludicrously overpriced, and overhyped. Not a single classic Moog ladder filter sound you couldn’t do just as well with a modern plugin, or almost any modern hardware. Hey, even the R3 – my most underdog synth – can do pretty decent Moog impressions. And if you are with the “Digital-will-never-sound-like-true-analog” esoterics, there is still the option of Neo Old School: Using the old design with the upsides of modern analog technology. Get yourself a Boog, for fuck’s sake. (And a life.)

Still… as we know, it’s all about the workflow – and about that unique combination of how an instrument looks, feels, and sounds. So when I saw a Moog enclosure and front panel on eBay for a couple of Euros, I could not resist and had to buy it.

“It’s aliiiiive!” – How to give life to an empty corpus

Continue reading

The Noisy One

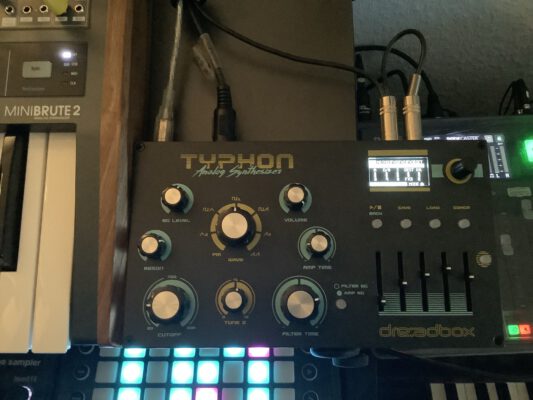
I’ve won a Dreadbox Typhon in a sweepstake, and it’s bloody brilliant. Like, really, really brilliant! A fun machine with a monster sound and a great concept for real-time sound manipulation and editing. If there wasn’t that nasty problem with digital noise.

Dreadbox Typhon powered from USB hub; preset A1

Just listen to it! It’s wonderful – but you will have noticed the nasty sound on switching it on, and the permanent high-frequency noise. (Oddly enough, it’s no longer in the recording as soon as the sequencer starts, but believe me – it’s there, all of the time.)

Digital noise, for sure.

Continue reading

Stereoping Hardware Controller for Crumar Bit

Stephan (aka umusic6) did some nice work:

Thanks to his efforts, there is now a Bit Edition of Stereoping’s Synth Controller, for Crumar Bit-01/One/99 with the Tauntek firmware. You can read up on the firmware, or order it, here.

(No, this is not an affiliate link, I have no share in this. But I think it’s a great project.)

Bitte nicht nach einer Kalibrierung für das Pitchbend-Rad beim Blofeld suchen. (Macht er selber.)

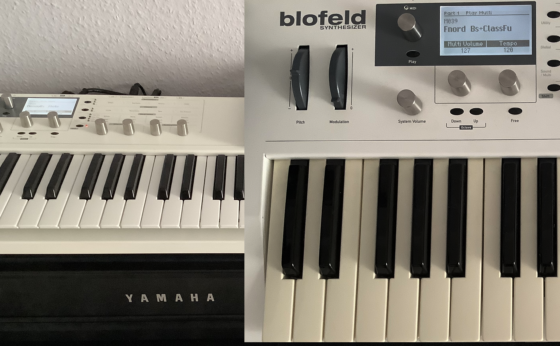
Waldorf Blofeld Keyboard white, view on the pitchbend wheel

One day, my trusty Blofeld started drifting out of tune – pretty unusual behaviour for a digital synth. Even if it was in tune first, the drifting started as soon as I touched the pitchbend wheel, so I suspected that this was the culprit.

Blofeld wheelbox

Opening the Blofeld (all 18 screws on the bottom – remember?), removing the wheelbox, and measuring the pitchbend pot confirmed that the potentiometer was indeed damaged – while an end-to-end-measurement showed 9k, the end-to-mid-resistance could be virtually anywhere, screaming “Mechanical Damage!” to me.

The potentiometer is 10k lin with a knurled 6.3mm shaft and an M10x0.75 mount. Waldorf seems to have used a Piher T-21Y type (datasheet). As I did not find something fitting in my parts boxes, I took it apart, cleaned it, adjusted the pickup spring, applied a bit of contact grease, refitted the pot and closed the Blofeld

And now for the good part…

Although I measured that the wheel now zeroed around the pot’s 5kOhm mark, it had most definitely shifted slightly, so I started looking for the calibration routine. There has to be a calibration routine, right?

But the good Blofeld seems to calibrate on power-up and on the first usage of the wheel – no calibration routine for the wheels needed. Phew!

Waldorf Blofeld Keyboard white, view on the pitchbend wheel

Important note: Be careful to ensure that the Molex connector for the wheelbox sits correctly – when I pulled the plug, the plastic holder for the pins got pulled towards the edge of the PCB so when I reattached the plug, it did not sit correctly. Rule of thumb: If the plastic of the connector is visible from the top, you might want to push it back under the PCB.

Midifying Jenny, Step 1: Replacing the old keyboard chip with a Teensy

This is the first post in a series of small projects for retrofitting my JEN SX-1000 monosynth with a simple and cheap MIDI interface controller. Read about the basic idea here. Today, I am designing and building the micro-controller brain of the Jenny retrofit – if you are capable of basic soldering, it should not take you more than two hours and a couple of very common electronic parts.

Continue reading