21st-century rewrite of the firmware for these vintage Italian Analogs. Allows for parameter control via MIDI CCs.
- A Bit controller panel for the TB MIDI Stuff iPad app can be found here: [TBMS file download]
- If you would like to go for a external hardware controller, have a look at Stereoping’s Synth Controller, now available in the “Bit Edition“.
Bit-99 Firmware
Control your Crumar Bit-99 via MIDI CC.
Info sheet listing the CC mappings for the parameters (PDF)
Licensed from Bob Grieb, tauntek.com – Firmware Details
Footnote: The firmware was developed with a Bit working with CEM filter chips. Some of the earlier models work with SSM chips but the differences seem to have been provided for in the hardware, so this difference in hardware should be no problem with the firmware.
2-chip set to be sold at €50 including EU VAT, excluding delivery – coming soon. If you can’t wait, use the contact page to send me a message, and I will reply.
Bit-01 Firmware
The Bit-01 is the rack version of the Bit-99, also built as Unique DBE, an American-made clone. Slightly different firmware chips needed. It has the same CC control capabilities and limitations as the Bit-99 firmware.
Bit One
The Bit One is the earlier predecessor of the Bit-99. Capabilities and sound are identical. It features sliders for detune and noise control, rather than the Velocity Sensitivity control found in the Bit-99.
Info sheet on CC controller numbers and new firmware (PDF)
How to upgrade

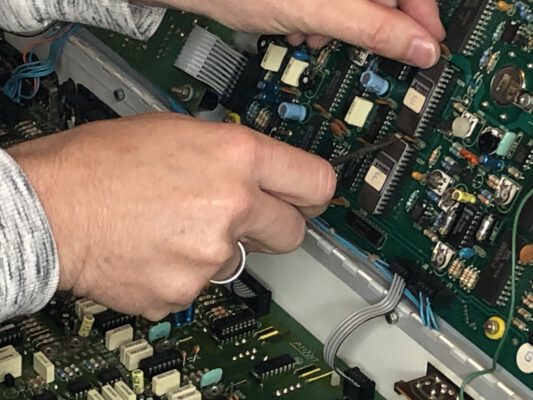
Replacing the old chips with the upgraded firmware is not too hard – it takes a couple of minutes – but be very careful with the old Italian hardware:
- Disconnect the synth from mains before removing the lid.
- Beware of static electricity – it is not only unpleasant to feel the discharge, it is harmful to the electronics. So better don’t stroke the cat wearing rubber-soled shoes and an Angora wool sweater while upgrading the synth.
- Do not use too much force when removing the old chips. As it is rather likely that you won’t own pliers for chip removal, use a flat screwdriver or a knife. Insert it between the chip and the socket – not underneath the socket – and wedge the chip out, bit by bit. Keep the old chips in case anything goes wrong.
- Look for the correct position of the new chips. The chip labeled C26 has to go to the upper socket, C27 has to go to the bottom, next to the back of the synth. Both chips have to have the little notches facing upwards.
- Be as gentle inserting the chips as you were removing the old ones. Be careful not to bend any pins. If necessary, support the PCB to keep it from bending. The chips will klick into place.
- If the synth does no longer work after the operation, don’t panic. Check whether the right chip is in the right socket the right way round. Check for bended pins. Remove the new chips, re-insert the old ones – if this fixes it, the chips have to be replaced.
Retrigger or real-time control?
As BIT owners know, most of the parameters take a retriggering of the note played to become effective. This is a feature of the own design that is not changed with the new firmware – meaning that, for example, you cannot hold a note and sweep the filter for it (unless you use the LFO to do it). Only a couple of parameters are processed in real-time, i.e. you can change the sound of a held note by turning the dial. For a Bit-99, these are:
- DCO1 Waveform
- DCO2 Waveform
- Noise
- Detune
- Wheel Amount
- LFO Destination Switches
- VCF Resonance
- VCF Enveleope Invert