Could you also patch an Alesis IO Dock II?

Is it possible to retrofit an Alesis IO Dock II with an internal USB hub, just like I did with my IO Dock 1? TL;DR: Some have tried and failed – seems like Alesis deliberately switched the code for this hack off.

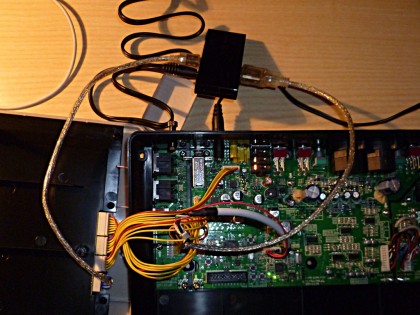
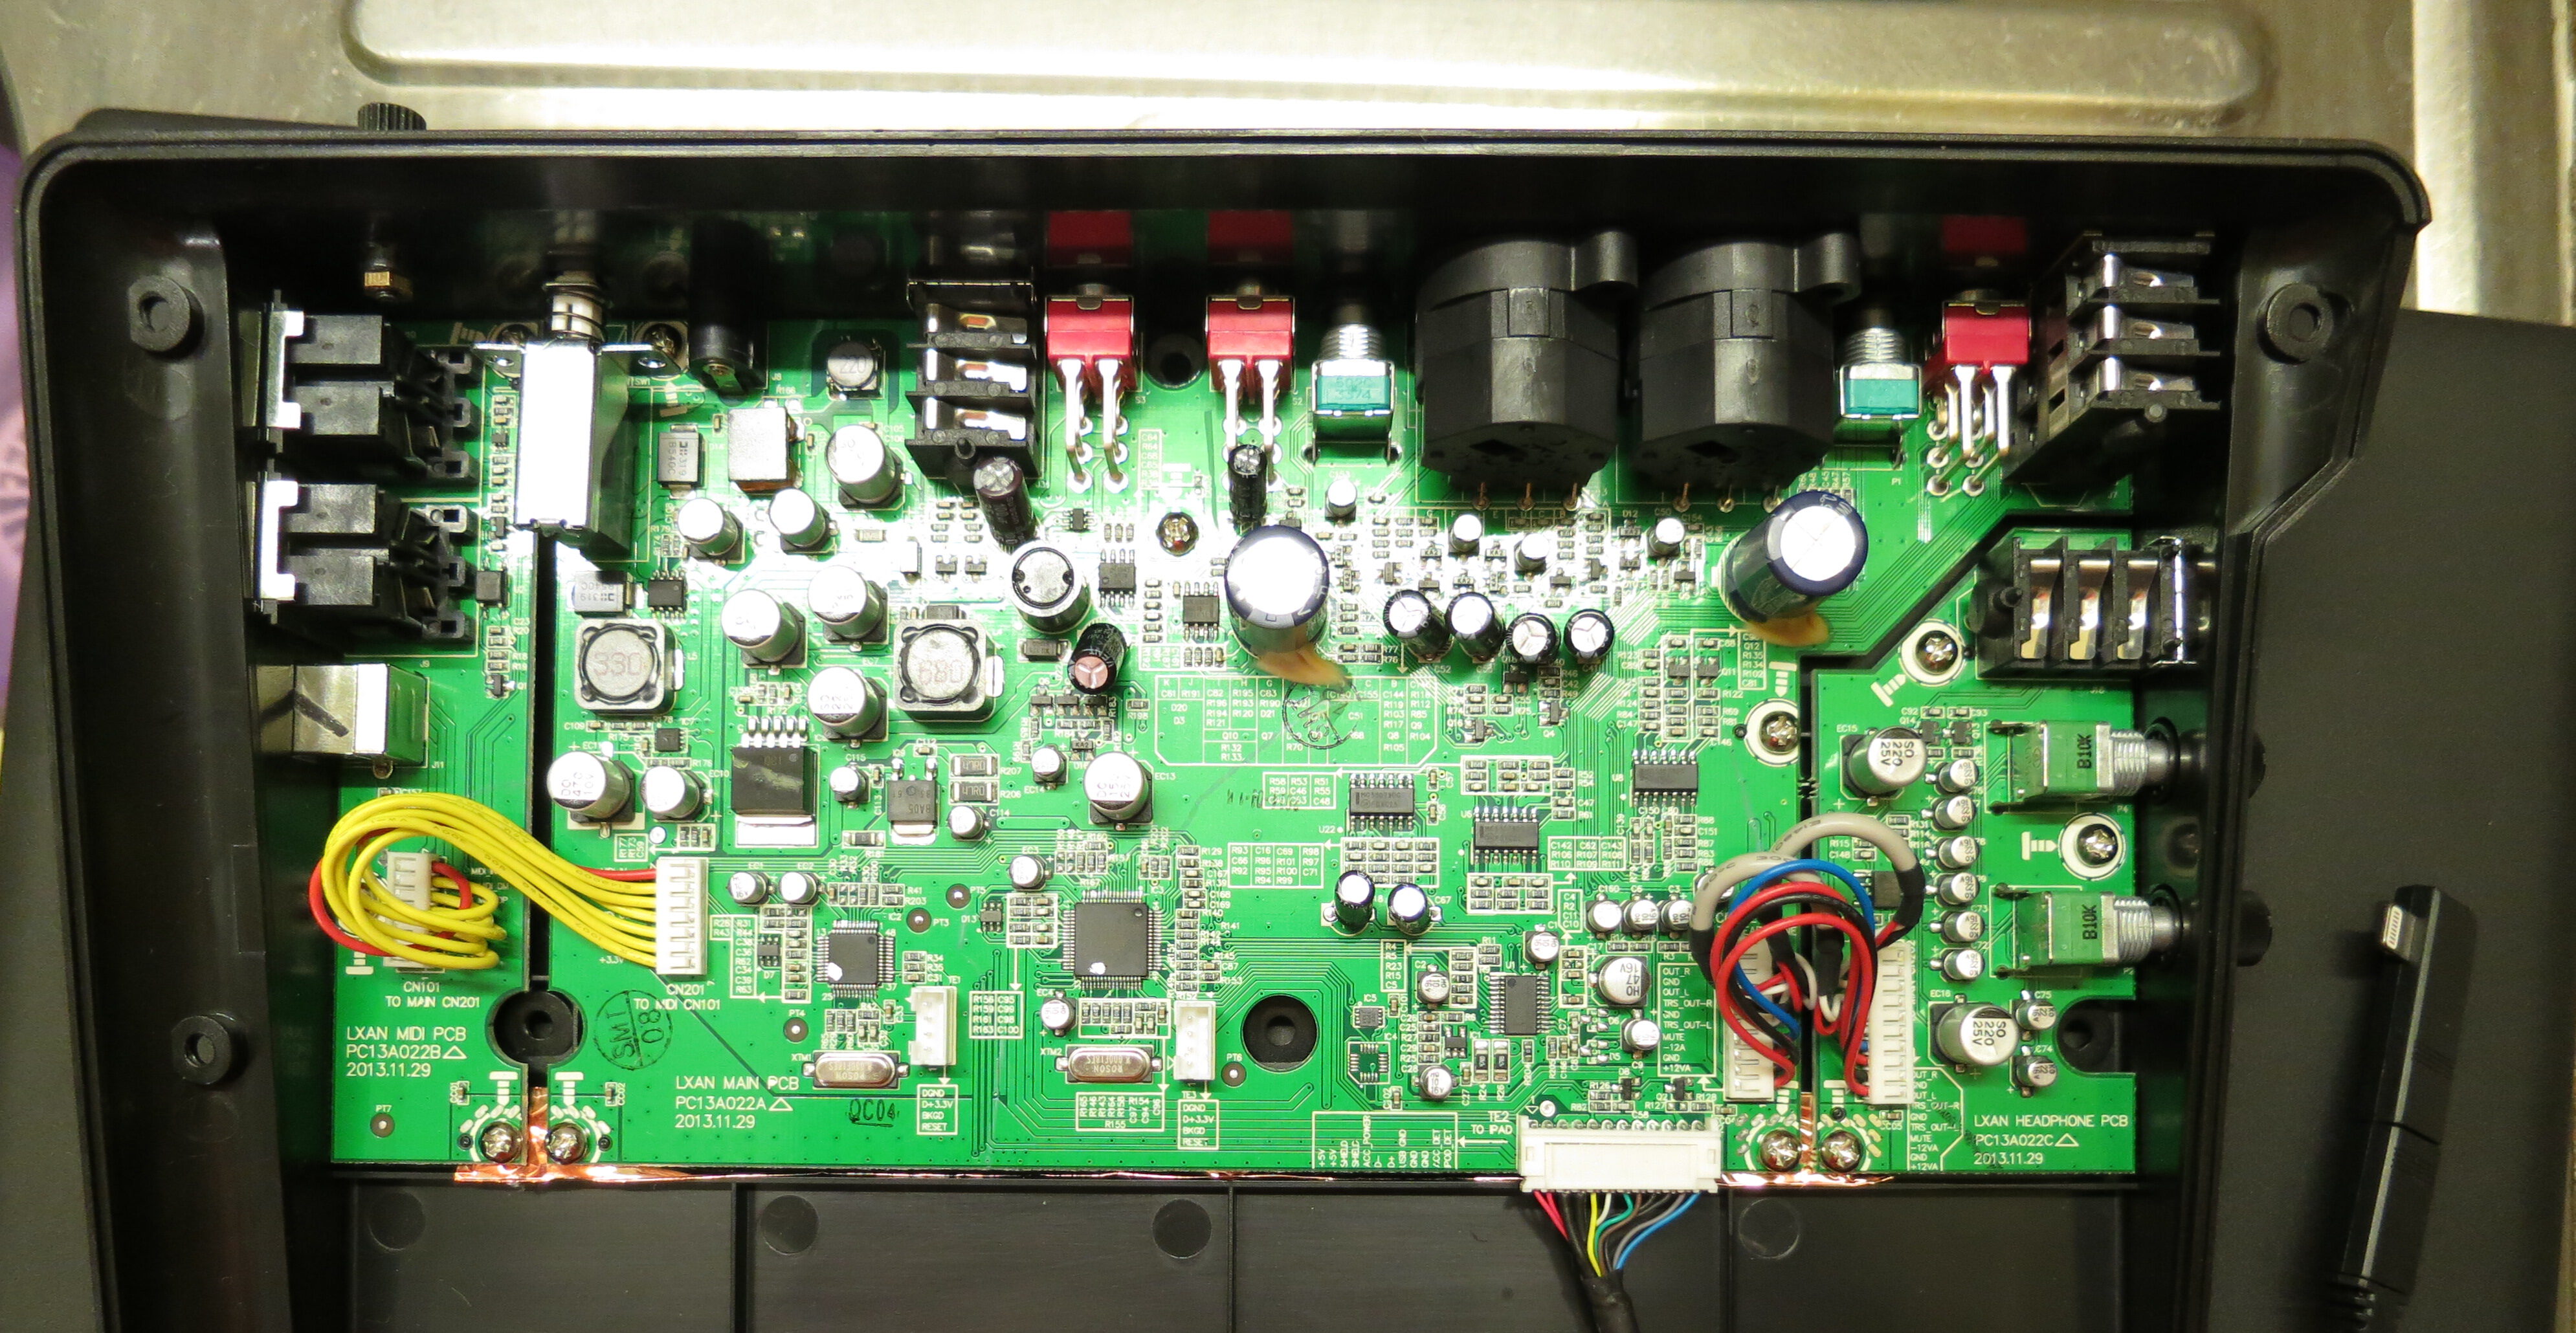
This photo was sent to me by Blek in the Czech Republic who asked that very same question. He has taken a look inside his IO Dock II and noted that it features an all-new PCB, so my original hack won’t work. And of course there is no guarantee that the prerequisite for the original hack is still implemented in the IO Dock II: the ability to function not only as a USB bus host for the iPad, but as a USB bus slave device, with the iPad working as the bus master.

The good news is: It is simple to give it a go, as Alesis took extra care to label the locations of the USB bus signals:

iodock2

So here is what you do to try it:

  1. Get a male-female pair of plugs matching the connector in question. Possibly a 12-pin version of these connectors, so as in the original hack, 2mm pin grid stripes could work. They are a bit hard to come by, but it is possible.
  2. Solder connections from male to female for all lines but 6 and 7 – the D- and D+ USB data signals.
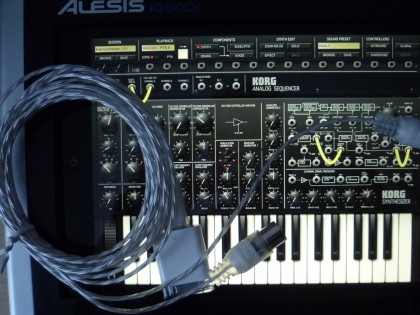
  3. Get a suitable UBS2.0 hub – I used a Belkin F5U404; you might have to try a couple of hubs if that one does not work.
  4. Take the cable that is meant to connect the hub to the computer – it should have a standard USB plug on one end and a USB mini connector on the other end – and cut it in half. This is the only non-reversible action you are taking, but as it is easy to buy a replacement cable, there is not much harm done if it does not work.
  5. Take the cable half with the USB A-type plug, for connecting it with the computer. Solder the cable wires to the connector that goes into the IO Dock side as follows: Red (Vcc) -> pin 1, White (D-) -> pin 6, Green (D+) -> pin 7, Black (GND) -> pin 8.
  6. Take the other cable half with the USB mini-B plug for connecting to the hub and solder it to the iPad side, i.e. to the connector that is leading to the iPad connection cable. Once again, solder red to 1, white to 6, green to 7, and black to 8.
  7. Do some checking for connections and possible short-circuits. Believe me, it’s worth the effort.
  8. Unplug the IO Dock board connector for the iPad. Insert your freshly-made adapter.
  9. If it works, make a video of it. Become world famous. :)
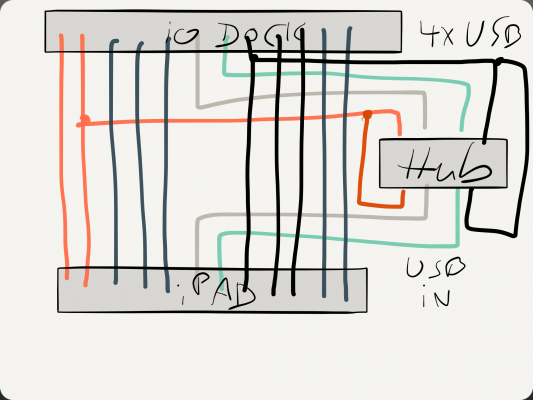
Wiring diagram

Wiring the USB hub connector: Once again, the trick is having the iPad work as USB host rather than as a slave device, and the IO Dock as the slave rather than as the host. Use your hub’s connector cable, cut in half, and solder the color-coded wires to the connectors as shown.

Sorry for my rather artistic impression of the adapter, hope it gives you the right idea. Pin 1 is to the left, pin 12 to the right. IO Dock side is up, iPad connector side is down.

Just to be sure:

  • I’d strongly advise you to solder and try out the adapter rather than soldering any wires to your IO Dock. It is a good thing to keep that sort of stuff reversible. For this reason, don’t start dremeling before proving that it actually works…
  • …which I won’t guarantee you. Mind you, I don’t even own an IO Dock any more. If you start doing this, you should know what you are doing.
  • Please understand that the base for this hack is a feature that Alesis seems to have implemented deliberately into the first IO Dock (see Dan Radin’s comment): the ability to work as a USB slave to the iPad, in addition to normal operation, where the IO Dock works as a host for the iPad. If the IO Dock does no longer do that, you can try to rotate the USB hub, but that’s about it.
  • Please write me back with your experiences. Please don’t get on my tits with any attempts to make me do this hack for you, or repair your IO Dock if anything went wrong. (Oh my god – I just realize that bullshit warnings are obviously contagious.)

It’s worth giving it a try, isn’t it?

Thanks to Blek for allowing me to use his pictures.
Tech Hack: Alesis IO Dock with USB Hub

Update, May 2014. I’ve put the unit on eBay. And I’ve summarised lessons learned from this hack here.

The Alesis IO Dock is a great product for iPad musicians – this small hack makes it even greater. It overcomes one limitation of the IO Dock: You can’t simply hook it to a USB hub. So I decided to build in an additional hub – which allows me to hook up additional class-compliant interfaces like my M-Audio Axiom master keyboard, and power them via the hub.

Yes, it works. No, it hasn’t been thoroughly tested yet. So try at your own risk.

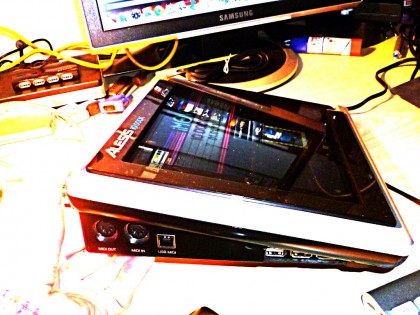
The hacked IO Dock

The hack isn’t too sophisticated or demanding. Yet there are a couple of things we need to discuss before going to the step-by-step description. I’ve also tried to answer some questions that might arise in the FAQ.

What we’re doing:

We’re smuggling the USB hub into the connection between the iPad and the IO dock. (The video explains why.)

What you need:

  • A USB hub. Edit, 4-Jan-2012:  After giving it some more consideration I think that you might start with a normal hub rather than a powered one. (I used a powered hub Belkin F5U404.) This has certain limitations, though. Why? USB knows two basic types of port power – normal USB ports are supposed to deliver a 5V supply current of up to 100mA. That is enough to power simple interfaces and USB sticks. It is not enough to charge your phone, or to power a USB master keyboard.  So using a hub without power supply would normally mean that the iPad is not properly charged – but the way the iPad charges is actually hard-wired in the IO Dock’s iPad connector, so the iPad will charge even without a powered hub. (It is connected to the USB port’s input rather than to its output anyway).  IMPORTANT: As we will be using the IO Dock’s power supply, there are some limits to what we can drive with our hub. Please: See the FAQ. And I’ll have a more thorough look at the IO Dock’s power supply circuitry soon.
  • The hub’s connector cable. These cables have a flat A-type USB plug to go into your computer, and usually a micro-USB B-type plug like the ones for charging your phone (if you don’t have an iPhone, that is). We are going to cut up this cable and configure it to supply and interface the hub within the IO dock.
  • 2x 1.27mm 2mm grid pinstripe connectors – one 6-pin male, one 6-pin female. If you can, get connector strips with turned sockets; you can use them as plug and as female connector, like these ones. The original connector is like this one: [sample]
    EDIT, 19-Aug-13: Corrected the „these ones“ link to RS Components. Also see FAQ section.  EDIT, 10-Sep-14: Modelmakers may look in their boxes for JST PH connectors (thanks Wolfgang!)
  • A small 100uF/6.3V capacitor – or something along these lines – as a buffer for the hub’s power supply. If you haven’t already, see the FAQ.
  • Basic soldering tools and skills. 
  • A Dremel tool to cut out a hole for the additional USB ports in the IO Dock.
  • Glue to fix the hub within the housing – I used a run-of-the-mill hot glue gun.
  • A class-compliant USB device for testing. (What’s that? See the FAQ.)
  • Approximately 2 hours to do it.
Me with a surgical mask and a Dremel tool

Not really a project for the aspiring Evil Mad Scientist – there’s hardly any rocket science involved – but especially the Dremel brought out my inner Walter White.

So let’s get started!

Weiterlesen

Proof-of-concept: Alesis IO Dock bekommt einen Hub

iPad im IO Dock - macht das Midikabel am wackeligen Camera Connection Kit überflüssig

iPad im IO Dock – macht das Midikabel am wackeligen Camera Connection Kit überflüssig

Am Alesis IO Dock führt kaum ein Weg vorbei, wenn man mit dem iPad Musik machen möchte. Zugegeben: man kann Verstärker auch an den Kopfhörerausgang anschließen, und für die Verbindung zum Midi-Masterkeyboard sorgt auch die Kombination aus Camera Connection Kit und einfachem Midi-Adapter. Wirklich betriebssicher ist das nicht, dafür sorgt allein der 30-polige Apple-Stecker. Das IO Dock gibt dem iPad nicht nur eine stabile Heimstatt, in der es mit Strom versorgt wird, es bietet vor allem exzellente Audio-Ein- und Ausgänge in stereo, einen regelbaren Kopfhörerausgang, Goodies wie Phantomspeisung für Kondensatormikros und Midi- Ein- und Ausgänge. Unverzichtbar.

In einem Punkt ist das IO Dock einem Camera Connection Kit allerdings unterlegen: es bietet keine Möglichkeit, zusätzliche USB-Geräte einzuschleifen. Bei mir wäre das ein kleines Masterkeyboard namens M-Audio Axiom; man kann es entweder über die klassische Midi-Schnittstelle anschließen – wobei es seinen Strom dann über ein klassisches 12V-Steckernetzteil bekommt – oder einfach über USB: dann hat das Keyboard nicht nur Anschluss, sondern wird auch gleich über die USB-Speisespannung mit Strom versorgt. Man muss nur darauf achten, einen USB-Hub mit eigener Stromversorgung zwischenzuschalten, weil das iPad auf alle größeren Verbraucher äußerst allergisch reagiert.

1 Netzteil sparen, 1000 neue Möglichkeiten gewinnen

Wäre es nicht schön, das Keyboard direkt an das IO Dock anschließen zu können und auf diesem Weg ein Netzteil (a.k.a. „Wandwarze“) loszuwerden? Leider hat das Dock den falschen Stecker: An den eingebauten USB-B-Stecker (das sind die fast quadratischen, wie sie sich in Druckern und externen Festplatten finden) muss man irgendwo einen Computer anschließen. Ein USB-Bus braucht nämlich einen Master – einfach nur einen Hub anzustöpseln würde nicht reichen. Was aber auch heißt: es gibt leider keine einfache Möglichkeit, weitere USB-Peripherie anzustöpseln – sei es ein weiteres Audio-Interface, sei es eine Kamera, sei es ein Keyboard. Spätestens, wenn mein von mir via Kickstarter stolz mitfinanzierter Superluxus-Musik-Controller kommt, ist das kein Zustand mehr – der hat nämlich ohne Zusatz-Hardware gar kein Midi mehr, und ich wäre gekniffen.

Deshalb reifte in mir schon länger die Vorstellung, dem IO Dock mit einem kleinen chirurgischen Eingriff einen Extra-Hub zu verpassen. Der könnte Geräte wie mein Keyboard problemlos mit Strom versorgen – und für ausreichend Anschluss sorgen. Seit heute weiß ich, dass das nicht nur eine theoretische Möglichkeit ist: man kann den Hub zwischen iPad und Dock einschleifen – und wie beim Camera Connection Kit ist das iPad dann der USB-Master. Das IO Dock funktioniert wie gewohnt, aber man kann weitere Geräte anschließen und aus dem Hub mit Strom versorgen. Das lässt sich alles sogar bequem ins IO Dock einbauen!

Testweise frei verdrahtet: Ein USB-Hub "im" IO Dock

Testweise frei verdrahtet: Ein USB-Hub „im“ IO Dock

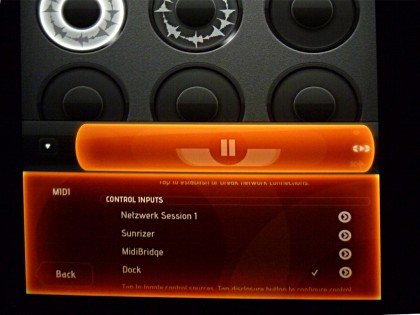
Loopy HD erkennt das Dock ohne Probleme - trotz zwischengeschleiften Hubs.

Loopy HD erkennt das Dock ohne Probleme – trotz zwischengeschleiften Hubs.

Wie das lief, darüber demnächst mehr. Detailliertes Howto und Video folgen, wenn der Einbau fertig ist.

Nebenbei: Wahnsinn, was sich alles getan hat, als ich mich über die Unstimmigkeiten der Musiksoftware auf dem iPad ausgemährt habe. In diesem Dreivierteljahr sind viele der Probleme, die ich beschrieben habe, verschwunden; die Software ist erwachsen geworden. Man kann ihr regelrecht beim Reifen zusehen. Und großen Anteil daran haben Einzelkämpfer wie der Loopy- und Audiobus-Entwickler Michael Tyson. Wie die sich mit ihrer Nutzergemeinde austauschen, um Bugs auszubügeln und neue Features zu erfinden, ist großartig. Wäre doch nur Apple auch so offen – dann wäre uns der zu nichts kompatible Steckverbinder im neuen neuen iPad erspart geblieben, es würde weiter ins IO Dock passen und ich hätte mir mit Sicherheit eins gekauft – die zusätzliche Prozessorleistung kann man für Musik gut brauchen. Seufz.