Cheat Sheet: Noten und Akkorde auf dem Launchpad

A tutorial for using the Novation Launchpad Pro as a synth keyboard.

What this is about

Last summer, I borrowed a Launchpad to take along on my holiday, and fell in love with it. The Launchpad is a new instrument; you have to relearn the movements of your fingers. These considerations and patterns are supposed to make learning easier.

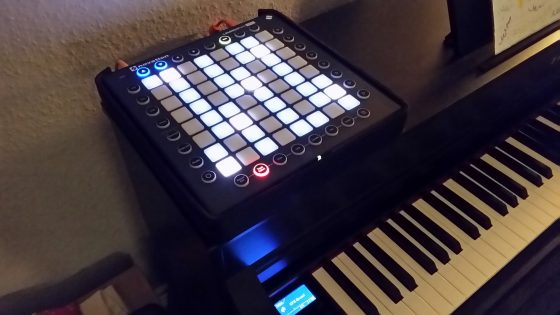
Launchpad Pro sitting on top of my piano

I am not much of a musician, nor do I know that much musical theory. The few musical skills I use these days are mostly self-taught. When I started discovering synthesizers, I got myself a table of the basic minor and major chords and their inversions. This helped me produce the first harmonies, just like someone learning the first chords on a guitar. This document is supposed to give you that same kind of start.

Weiterlesen

V2.0: A Teensy-based MIDI Controller

Building my own wheels for the Launchpad Pro – once again, with style.

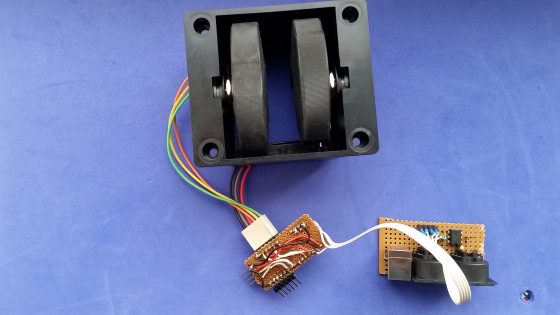
Two weeks ago, I started a little sunday afternoon project, sucessfully building my first own MIDI controller – a pitch bend/mod wheel/midi merge device to serve as a companion to my new Launchpad Pro. Using an Arduino, a prototyping board by SparkFun, and community-made code, I succeeded with surprisingly little effort – the most time-consuming part was finding and fixing the errors I had clumsily soldered into my pathetic excuse for a MIDI interface. But it worked!

Launchpad Companion Controller in actionAs they say, the worst thing that can happen is that you succeed. The quick and easy success made me hungry for more – I started a MIDIfication project for my JEN SX-1000 monophonic synth, based on a Teensy, another microcontroller board that can be used within the Arduino development eco-system but is much better suited to MIDI/USB applications.

V2.0: A Teensy-based MIDI controller

This is actually a side project to that. I looked at my self-made controller and noticed that it is usable but not very playable – I wanted real wheels for the Launchpad, not sliders. So I decided to redo a V2.0 of the controller, based on the Teensy.

Weiterlesen

MIDIfying Jenny – A Call To Arms

Isn’t it about time my beloved Jenny got her own MIDI interface?

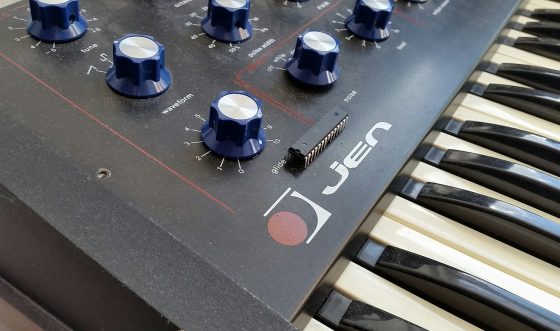
JEN SX-1000 front with ATMEGA chip

To be sure, microcontroller-based interfaces for the JEN SX-1000 do exist. Apart from the commercial CV/Gate solutions by Kenton, there is Neil Johnson’s keyboard interface design. But even if you can get hold of the PCB – a supplier in the JEN SX-1000 group on Facebook had a batch made – the design has an intimidating parts list, and takes some serious time to build.

Is it possible to do it simpler? Emboldened by my success building a small Arduino-based MIDI controller, I decided to start a midification effort that is

  • easy to do (requiring only basic soldering skills, if any)
  • easy to get (by using components that you can buy on Amazon if you have to),
  • easy to develop (using standard solutions from the Arduino community),
  • easy to schedule (because the project is divided up into little steps, each of which is a small afternoon sub-project with instant gratification),
  • easy to participate (by contributing own ideas and code for parts of the project).

I will describe the basic layout of the MIDI upgrade kit project here. Each step, i.e. each sub-project, will then be treated in a new post, depending how fast I (or the community) get them done.

Weiterlesen

Caveat

Nachdem ich gerade billigen und schnellen Erfolg beim Bau eines eigenen MIDI-Controllers hatte und deshalb ersthaft darüber nachdenke, ein größeres Analogsynth-MIDIfizierungs-Projekt mit Jenny anzugehen: eine kleine Erinnerung.


Wie sagt doch ein guter Freund immer:

„Das Schlimmste, was uns passieren kann, ist, dass wir Erfolg haben.“

Homebrew MIDI Companion Controller for my Launchpad Pro

I have bought a Launchpad Pro, and am still trying to figure out how to play a synthesizer with this thing. (More on this in another post.) It’s like starting over with keyboards, only with a better understanding what this is getting at. Simply great.

One thing I don’t like about the Launchpad is that it may give you velocity and per-note pressure sensitivity – provided your synth is capable of interpreting it – but takes away the traditional performance controls of a synth keyboard: the good old pitch bend and modulation wheels we have seen as our goddamn right as keyboard players ever since they were introduced with the Minimoog.

So I decided to build my own simple Launchpad Companion Controller, based on an Arduino.

Weiterlesen

„We apologize for the inconvenience.“

Ford Prefect and Arthur Dent - still from the BBC series

You may know these two gentlemen. If not, grab your VHS player, rent out the BBC’s „Hitchhiker’s Guide“ series, watch. Hurry!


If you have tried to send a message, or use the shop, you may have noticed that it did not work in the last two days – or, you didn’t notice, and are still waiting for an answer. A conflict between the Contact Form 7 plugin, which I have rediscovered, and the WP Cerber security plugin made some readjustments necessary. It should all be fine again now.

On the plus side, I had the opportunity to overhaul my shop pages, so if you are interested in an update for the Akai AX-80 or Kawai SX-240, it is easier to find and order. Concerning the Matrix-6, there is news: A very old bug in the firmware has finally been found and eliminated; it made it impossible to set negative DETUNE (parameter 12) values. Oddly enough, nobody except Gregor from Stereoping ever seems to have noticed, so there is no harm in continuing to use the firmware V2.14.

There is a new version V2.15 though – Bob fixed the bug – so if you feel that you need negative detune values, you may order that. Or you may take the opportunity to buy one of the V2.14 firmware PROMs extra cheap – while stocks last.

Gut zu wissen, Thomann! TIL… dass man die Luftkissen auch zerreißen kann

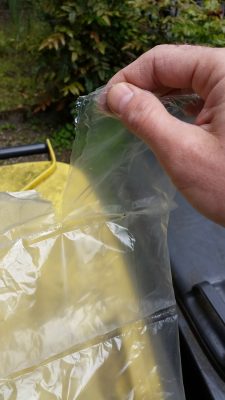
Wer einmal etwas bei Thomann bestellt hat, (und haben wir das nicht alle?) kennt die Luftpolster-Kissen, mit denen die wertvollen neuen Spielzeuge verpackt werden. Da Thomann aus gutem Grund übervorsichtig ist und gerne riesige, halb leere Kartons versendet, bekommt man meist eine ganze Menge davon.

Die nehmen zu viel Platz in der umkämpften Mülltonne ein – also bedeutet jedes Paket Fronarbeit: Um es mir mit mit den Nachbarn nicht zu verscherzen, bringe ich die Beutel immer alle zum Platzen, damit ich sie problemlos wegwerfen kann. Nun ja, flache Hand -> Stirn: man muss sie nicht zerstechen – die sind offensichtlich so hergestellt, dass man sie auch einfach in der Mitte zerreißen kann, alle auf einmal.

Fiel mir heute beim Entrümpeln eines Synthesizer-Kartons aus dem Keller auf – und ist ganz klar in der Kategorie „Nutzloses Wissen“: Das mit dem Platzenlassen der Luftpolster übernehmen schließlich in der Regel meine Kinder.

An Unreachable Quantum of Waldorf

Yes, it’s there. The first ever Waldorf Quantum can be admired at Musikmesse Frankfurt. Admired from a distance, that is, because they put the prototype under cover. „It’s our only one, and it still has to reach Superbooth, so we are a bit reluctant to have end-users play it“, the developers told me when I asked whether I’d be allowed to touch it.

Waldorf Quantum prototype, spotted at Musikmesse Frankfurt 2017

So what can you gather from some minutes of unabashed gloating in front of a Plexiglas shrine, and a few friendly words with the developers, that hasn’t been said yet? (Sort-of-super-Wave with granular synthesis and resonator banks on top of the standard wavetables, 8 voices, analog filters, destined to be ready in time to be bought for Christmas, for something around $3000, etc.?)
Here are some observations:
Weiterlesen

Niederlagen – auf dem Weg zum Technikfriedhof

Es ist ein schönes Gefühl, Dinge reparieren und instand halten zu können. Der Technik nicht ausgeliefert zu sein. Funktion möglich zu machen.

Es ist ein nicht so schönes Gefühl, durch Blödheit oder Ungeschicklichkeit die eigenen Erfolge sabotiert zu haben. Und wo ich gerade am Aufarbeiten alter Schludrigkeiten bin, kann ich auch gleich das festhalten: Manchmal baut man, wenn man baut, Mist.

Fall 1: der Beamer.

Bei eBay als defekt ersteigert, weil ich aufgrund der Fehlerbeschreibung die Vermutung hatte, da wäre noch was zu machen. Tatsächlich: Bald hatte ich heraus, dass der Projektor an sich völlig intakt war, aber unter einem schlecht montierten Gehäuseschalter litt – so ein Schalter, der beim Öffnen des Gehäuses die Stromzufuhr unterbrechen soll; er unterbrach sie auch gerne einfach so. Über meine Entdeckung war ich so euphorisch, dass ich unvorsichtig und ungeschickt geworden bin und mit dem Schraubenzieher im geöffneten Gerät einen Kurzschluss verursacht habe.

Drei Dinge passierten:

  1. Es knallte gewaltig.
  2. Die Sicherung flog raus und ich saß im Dunkeln.
  3. Vor Schreck riss ich meinen Arm zurück und dabei die Bedienplatine samt Stecker von der Platine.

Natürlich habe ich versucht, das wieder hinzubiegen bzw. zu -löten, aber ohne Erfolg. Tja, einige Sekunden lang hatte ich für praktisch überhaupt kein Geld einen eigenen Beamer.

Fall 2: die Büro-Kaffeemaschine.

Ach, meine gute, alte Saeco Vienna. Ein Sorgenkind von Anfang an, und dann: treu, brav, verlässlich. Bewährte Koffeinspenderin für einen guten Teil des Büros, und bei kleineren Wehwehchen mit etwas Liebe immer wieder zur Arbeit zu bewegen. Da sie das zwanzigste Lebensjahr schon hinter sich haben dürfte und sich zumindest in den letzten Jahren bestimmt nicht gelangweilt hat, ist das schon eine Lebensleistung. Und doch…

…plötzlich, nur noch Tröpfchen statt eines Kaffeestrahls. Wohl meinende Kollegen rissen laue Witze über Prostataprobleme bei älteren Herrschaften, kurz: es war wieder Zeit. Einen Sonntagnachmittag lang den Küchentisch blockiert, den Fehler gesucht und bald gefunden – wie beim allerersten Mal war es ein Krümel Kaffee, der den Durchflussmesser verstopfte. Schnell beseitigt und gleich noch an die Große Inspektion gemacht, also gereinigt, das Mahlwerk demontiert, Dichtungen ersetzt, zusammengebaut, ausprobiert, gemerkt, dass eine Dichtung fehlte, die Sauerei weggewischt, alles wieder aufgemacht, Dichtung umgesetzt, zusammengebaut, läuft. Super!

Also schnell aus der Wohnung schaffen, damit sie aus dem Weg ist.

Der Denkfehler wurde mir klar, als ich die Maschine am nächsten Morgen auf Arbeit aus dem Auto holte: Es ist kalt, auch in Frankfurt friert es nachts. Das Restwasser in der Maschine war auch gefroren. Und damit sind einige Dichtungen und Schläuche hinüber. Welche, das will ich schon gar nicht mehr erkunden – vermutlich die Boilerdichtung, für die man wirklich, wirklich alles auseinandernehmen muss.

Kofferrauminhalt

Links die erfrorene Kaffeemaschine, rechts der erschlagene Beamer. Und ein Paar alte Autoboxen

Das hier ist also nur noch eine Kofferraumladung Elektroschrott (genauer gesagt: ich habe beschlossen, dass es nur noch Elektroschrott ist), und geht demnächst zum Recyclinghof.

Aufgegeben? Ja.

Hätte ich die Reparaturkandidaten nicht noch einmal reparieren können? Vielleicht. Aber so wie mich der Beamer seit Monaten vorwurfsvoll anguckt, hätte mich auch die Kaffeemaschine vielleicht jahrelang angeguckt, bis ich irgendwann dann doch den Mut und die Zeit gefunden hätte, einen Tag für einen weiteren Reparaturversuch zu opfern. Nenn mich schwach: Ich habe das nicht mehr ausgehalten.

Ärzte, sagt man, können ihre Fehler auf dem Friedhof besuchen. Ich habe meinen zumindest hier im Blog ein kleines Denkmal gesetzt.