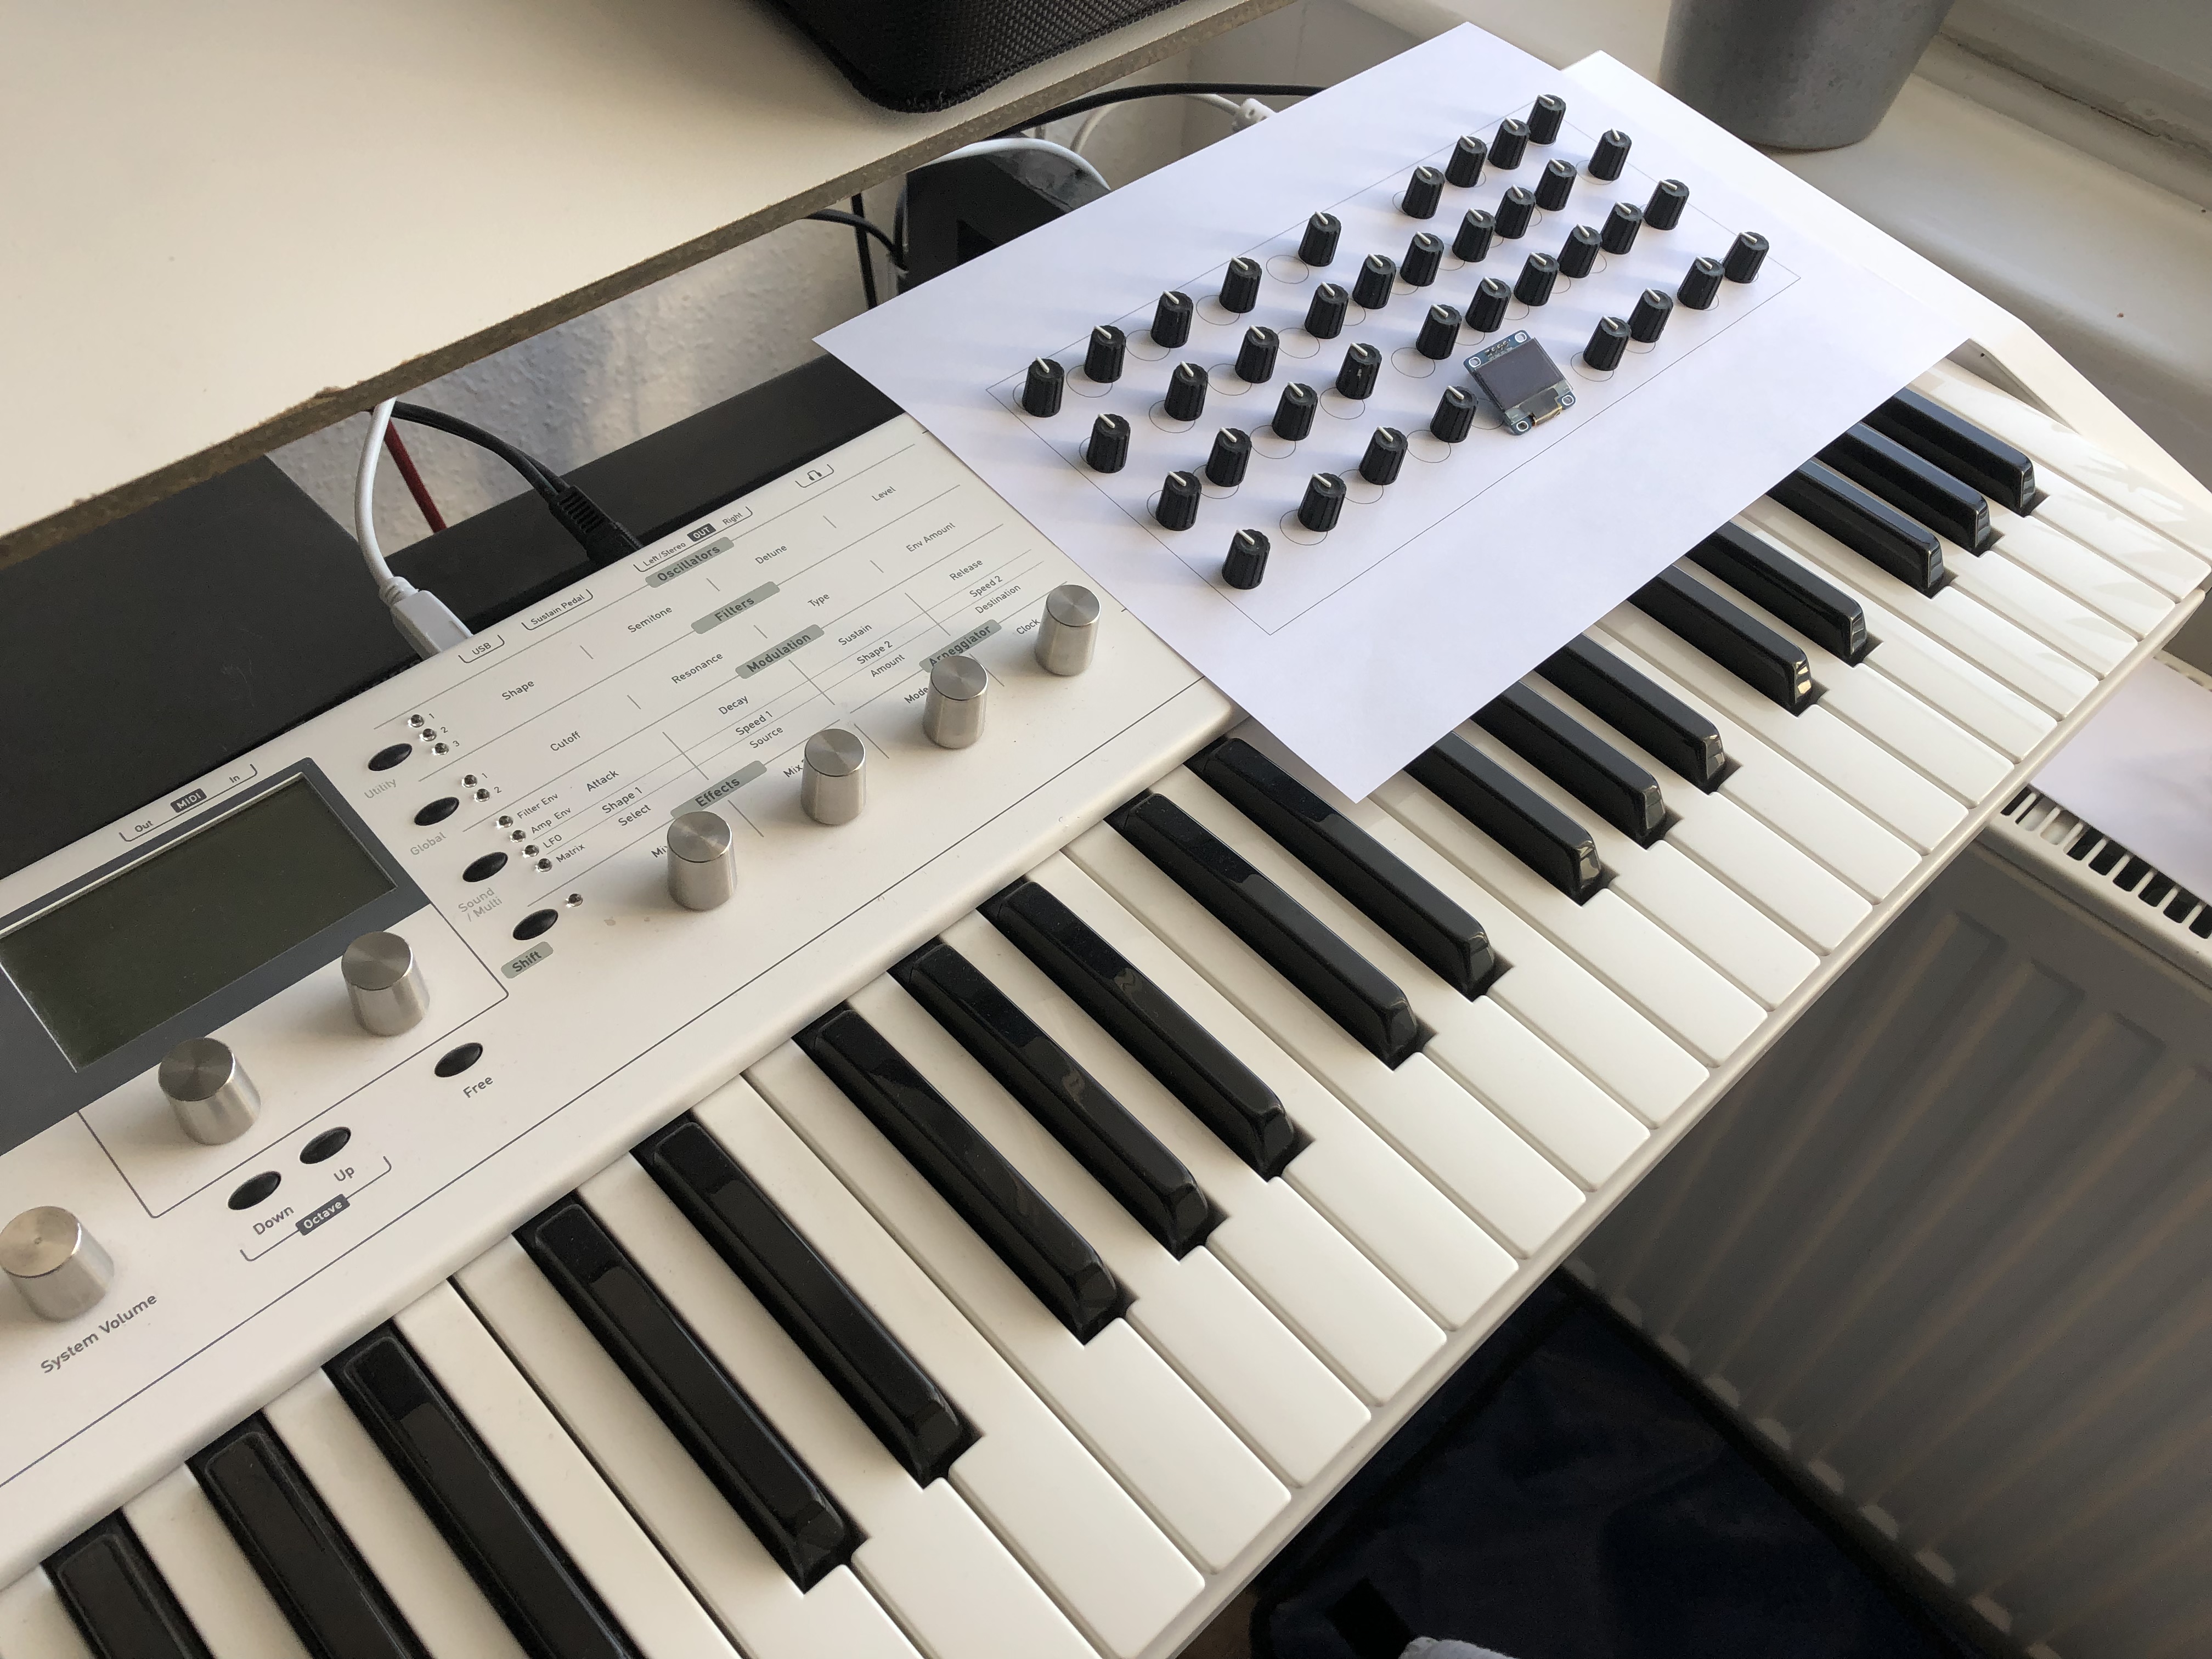
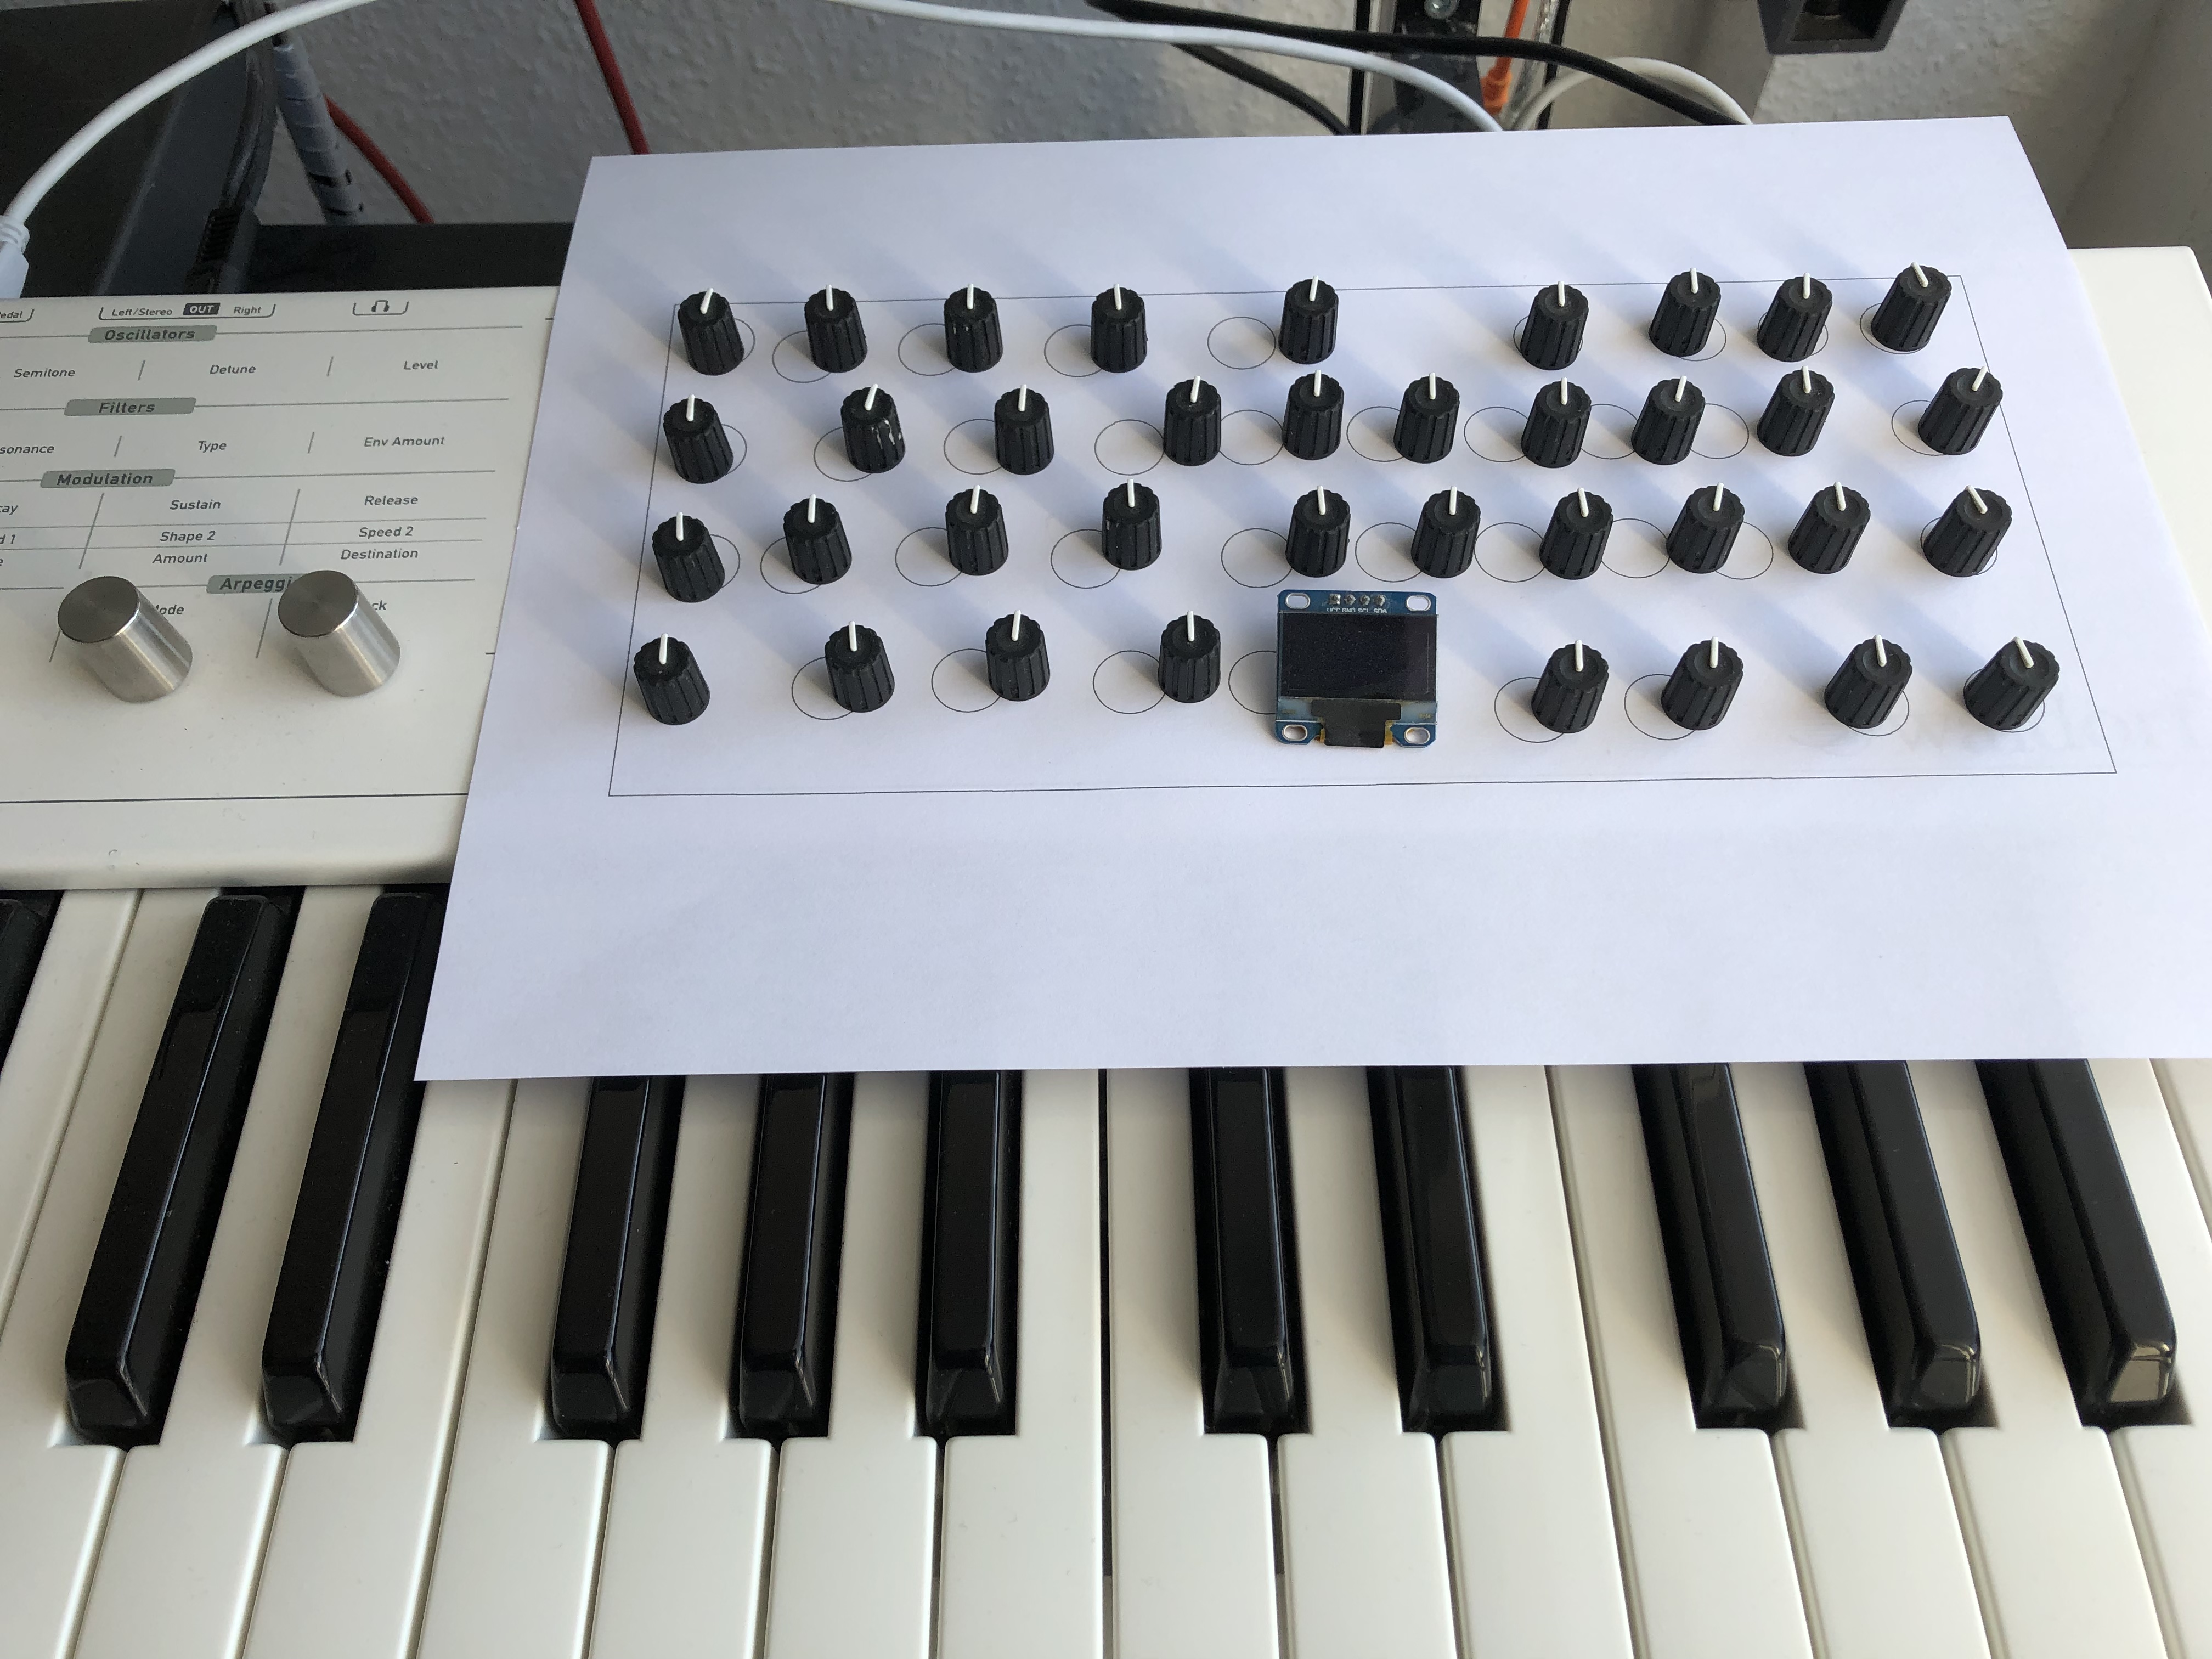
This is just a wet dream so far – a knobby controller integrated into the Blofeld. The layout being- ah, let’s call it inspired – by the Hartmann 20 that is, essentially, a Sledge in an expensive coat. (The Sledge is, essentially, a Blofeld with knobs.)
Incidentally, Jenny had to vanish in her new flightcase due to a broken keyboard frame – I had patched this several times before, but until I can manufacture a new part to fix this once and for all, she will have to stay put.
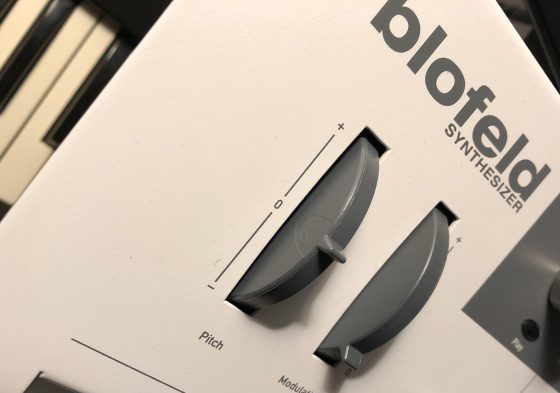
One day, my trusty Blofeld started drifting out of tune – pretty unusual behaviour for a digital synth. Even if it was in tune first, the drifting started as soon as I touched the pitchbend wheel, so I suspected that this was the culprit.
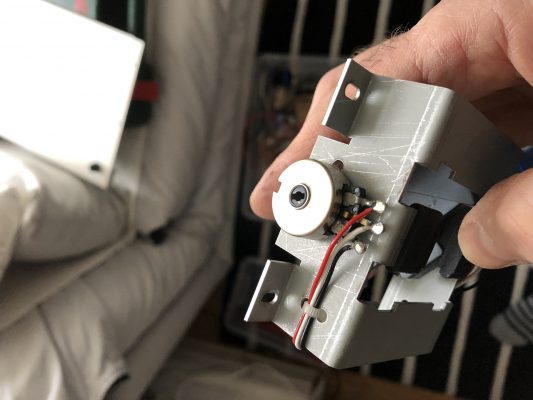
Opening the Blofeld (all 18 screws on the bottom – remember?), removing the wheelbox, and measuring the pitchbend pot confirmed that the potentiometer was indeed damaged – while an end-to-end-measurement showed 9k, the end-to-mid-resistance could be virtually anywhere, screaming “Mechanical Damage!” to me.
The potentiometer is 10k lin with a knurled 6.3mm shaft and an M10x0.75 mount. Waldorf seems to have used a Piher T-21Y type (datasheet). As I did not find something fitting in my parts boxes, I took it apart, cleaned it, adjusted the pickup spring, applied a bit of contact grease, refitted the pot and closed the Blofeld
And now for the good part…
Although I measured that the wheel now zeroed around the pot’s 5kOhm mark, it had most definitely shifted slightly, so I started looking for the calibration routine. There has to be a calibration routine, right?
But the good Blofeld seems to calibrate on power-up and on the first usage of the wheel – no calibration routine for the wheels needed. Phew!
Important note: Be careful to ensure that the Molex connector for the wheelbox sits correctly – when I pulled the plug, the plastic holder for the pins got pulled towards the edge of the PCB so when I reattached the plug, it did not sit correctly. Rule of thumb: If the plastic of the connector is visible from the top, you might want to push it back under the PCB.
I figured out that I have reached the point where the unpleasantness of having to buy, install and maintain a proper web shop has dropped below the unpleasantness of having to do everything by hand. (I am sure there is an XKCD cartoon for this.)
And there is also the fact that the many buyers of Bob’s firmware deserve professional handling of their inquiry. A machine is much, much better at this than me.
So this little blog is running WPShopGermany now – although I am not at all happy with their multiple documentation, things look reasonably well so far.
A German shop – for English speakers?
The WPShopGermany is fantastically well adapted to German laws and regulations, but not quite as well to speakers of other languages. To offer foreign language support, the makers recommend using the commercial WPML plugin – for which a license comes in at impressive 79 dollars, much more than I paid for the shop plugin. Which is all the more infuriating as the language files for US-English are all there (wp-content/plugins/wpshopgermany-free/lang/). And no, I am not using the free version.
Ve vill finally get se hang of your humour, was!
Luckily, I discovered that there is a newly developed free alternative to WPML, WP Multilang. Installing and activating the plugin made the shop run fine, with German and English texts – but I have not come round to translating every important title and page into two languages, so you might still have to employ GTranslate at some point or another.
To err is human. To blunder spectacularly is untergeeky.
I tell myself that this is the downside (backside?) of serendipity, but I tend to overlook things and produce errors. If you should serendipously stumble upon one of those – a missing translation, a missing order form, something running wild – drop me a line, will you? Cheers!
This is the first post in a series of small projects for retrofitting my JEN SX-1000 monosynth with a simple and cheap MIDI interface controller. Read about the basic idea here. Today, I am designing and building the micro-controller brain of the Jenny retrofit – if you are capable of basic soldering, it should not take you more than two hours and a couple of very common electronic parts.
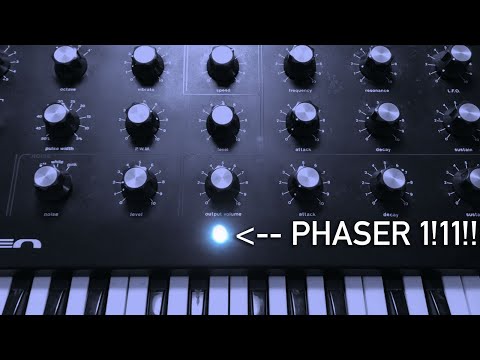
Vanity post: This is what a session with the JEN sounds and looks like, mainly playing it as a bass synth. Look out for the freshly integrated phaser from 20:05 onwards. Other electronic sounds are from my Blofeld, a Ferrofish organ and Synthstrom Audio Deluge beatbox, a Meris Enzo guitar synth, an occasional Octatrack sample, and Eberhard’s guitar.
The glorious monkey art was conceived and painted by my friend Gerald, who – apart from playing organs and the Deluge – edited the video as well.
…as I am installing proper shop software after all. Safer and faster for you, easier for me.
Might take a couple of days though until the webshop plugin is running and properly translated.
If you are about to lose patience, or would like to contact me about any issue or question, please use the contact form. (Yes, I DO know that it stubbornly mistakes some people for spammers but please stick with me; there is also a mail address on that site.)
I have been using Jenny as a bass synth recently, and I am quite impressed by the quantities of life and fun this old machine is adding to the mix. She doesn’t do that much in terms of tonal range, but what she does, she does well.
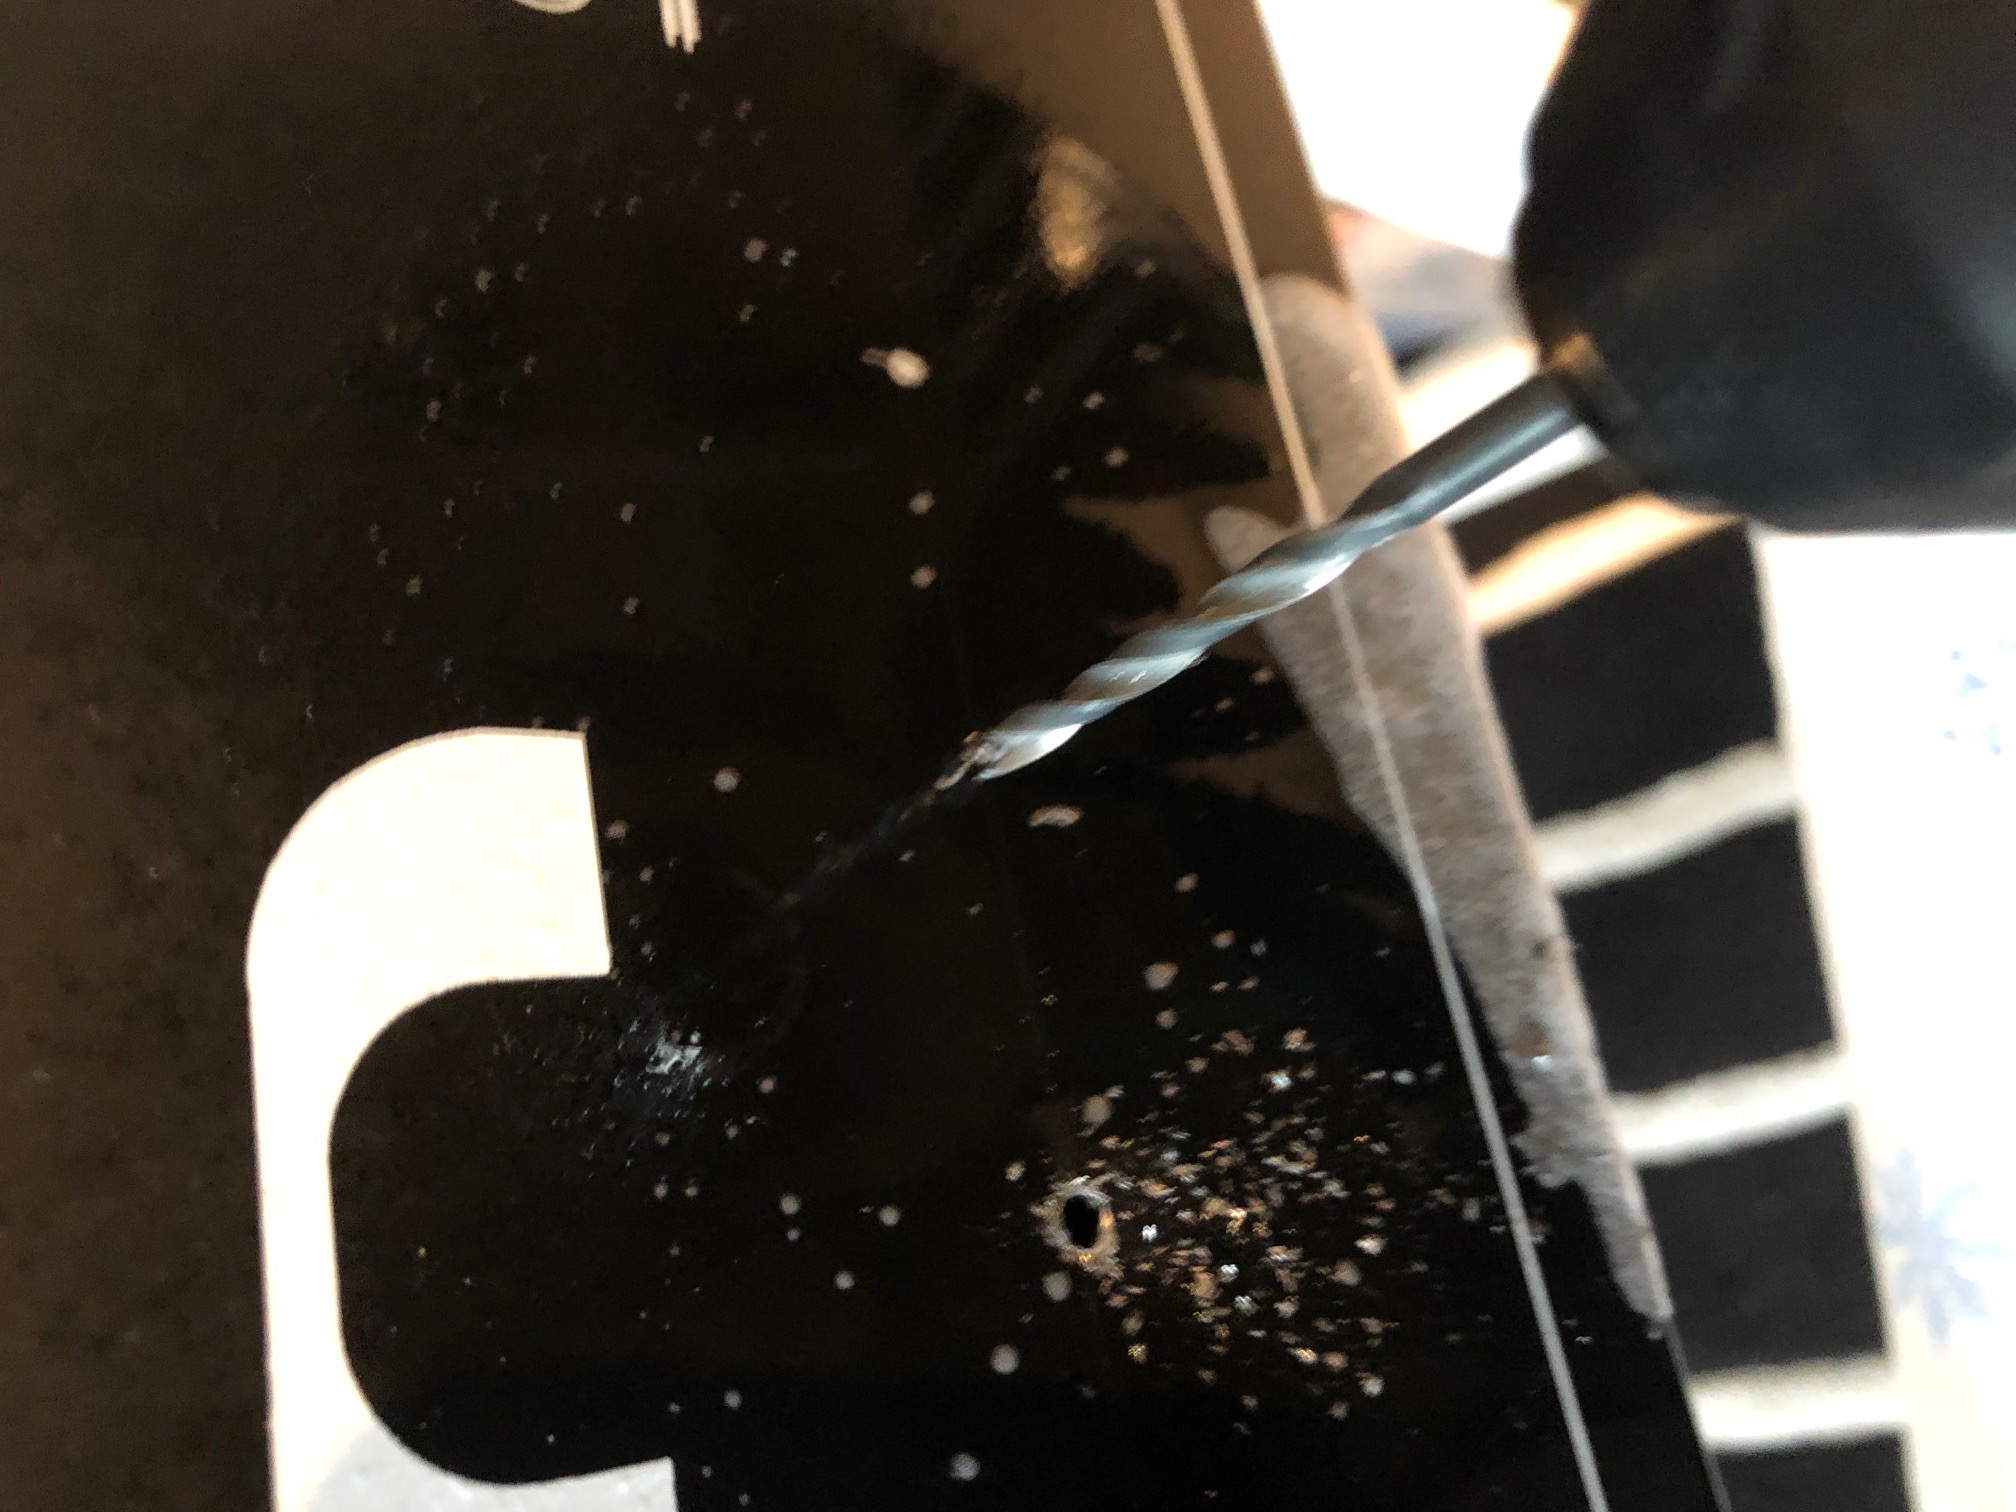
Drilling holes in Jenny’s front
I rediscovered an old trick when drilling metal: use a bit of alcohol, not on the person drilling, but on the surface you want to drill. And don’t go too fast.
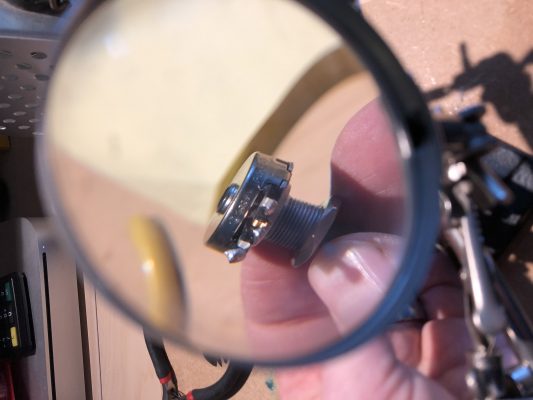
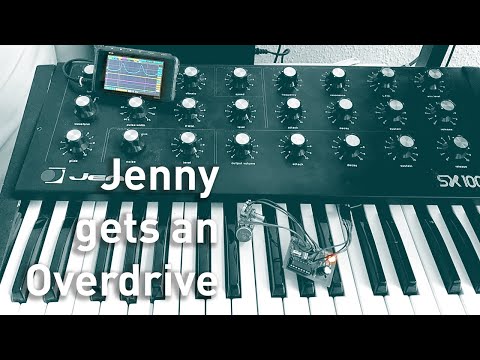
Giving my JEN SX-1000 a bit of additional low growl by adding a pre-filter overdrive.
A nice little addition: Insert a booster circuit kit where the coupling capacitor between oscillator and the filter used to be. Come on, you’ll have to take out that damn capacitor anyway. And it sounds really nice, punching through the mix (samples below) – especially in combination with the sub-oscillator mod.
I do admit that you might think that this is a superfluous mod. After all, when you drive this circuit – any circuit – into overdrive and into clipping, the resulting wave form will, gradually, start to resemble a square wave.
But I could do it, so I did it. And I like it. So let’s get started.
Kit by Musikding, I highly recommend them. More to come. EDIT: More came.
This website uses cookies to improve your experience. We'll assume you're ok with this, but you can opt-out if you wish.AcceptRead More
Privacy & Cookies Policy
Privacy Overview
This website uses cookies to improve your experience while you navigate through the website. Out of these, the cookies that are categorized as necessary are stored on your browser as they are essential for the working of basic functionalities of the website. We also use third-party cookies that help us analyze and understand how you use this website. These cookies will be stored in your browser only with your consent. You also have the option to opt-out of these cookies. But opting out of some of these cookies may affect your browsing experience.
Necessary cookies are absolutely essential for the website to function properly. This category only includes cookies that ensures basic functionalities and security features of the website. These cookies do not store any personal information.
Any cookies that may not be particularly necessary for the website to function and is used specifically to collect user personal data via analytics, ads, other embedded contents are termed as non-necessary cookies. It is mandatory to procure user consent prior to running these cookies on your website.